UPDATE: you can learn how to initialize Direct3D in XAML applications in this new article.
Since Microsoft has decided that “XNA is mature enough” and Shawn Hargreaves has moved to Windows Phone, it looks like we won’t see a version 5 that supports Metro-style applications. The only alternative for graphics programming is using pure DirectX 11 now that it has been merged in the Windows core (no more separate DirectX SDK downloads, yay!) and Microsoft is going to actively promote it (Visual Studio 2012 includes a nice node-based shader editor).
So, if you want to target Metro apps with DirectX, the only initial option is to use C++/CX, which in my humble opinion is a total overkill and a huge step back. Sealed classes, no member functions for structures… this is the 21st century, please let me use a modern programming language and not one that has been patched through 30 years of existence. Well, now you can do this, thanks to the SharpDX project. It’s a series of wrappers that let you access the DirectX libraries from your C# code, and since XNA looks like a dead end, it’s what I’ll be writing about from now on.
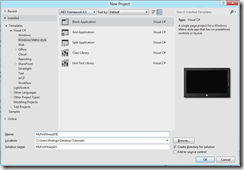
Begin creating a new Windows Store > Blank App (XAML) (remember that this template is only available if you are running Visual Studio 2012 in Windows 8!)
Now you can safely delete all the files except the Assets folder (contains the Windows Store icons for your program), the Package.appxmanifest file (has information about your application deployment settings) and the *_TemporaryKey.pfx file (the temporary certificate for signing the app). We will make everything from scratch.
Get yourself a copy of SharpDX’s libraries. You can download the latest stable version (recommended, since DirectX SDK is required for compiling) or get a copy of the source code and build it by yourself. I will be using the stable versions (2.5.0 as of the writing of this tutorial) and updating when necessary. Now, add references to SharpDX.dll, SharpDX.DXGI.dll and SharpDX.Direct3D11.dll.
Window creation for Windows Store applications is a bit different from everything so far. You can’t instance them directly, as they must be created via a proxy class that implements the IFrameworkViewSource interface. The only method that is enforced by this interface is CreateView, that returns a IFrameworkView object. And yes, you guessed it correct, your window class must implement it.
- internal class MyViewProviderFactory : IFrameworkViewSource
- {
- public IFrameworkView CreateView()
- {
- return new MyViewProvider();
- }
- }
This factory must be instantiated in your Main function and passed to the Run method of CoreApplication:
- private static void Main()
- {
- // Tell CoreApplication to create a view instance through the factory.
- MyViewProviderFactory factory = new MyViewProviderFactory();
- CoreApplication.Run(factory);
- }
The methods enforced by IFrameworkView are the following:
- Initialize(CoreApplicationView applicationView): this is the first function called when running the application. The applicationView variable has a CoreWindow property, but it’s null for some reason, so we can’t do anything at the moment.
- SetWindow(CoreWindow window): called immediately after Initialize, with the current window as a parameter. Now we can save it in a member variable for future use.
- Load(string entryPoint): create all the necessary Direct3D resources. Explained in more detail below.
- Run(): we must implement here our update and render loop. Explained in more detail below.
- Uninitialize(): called when the app is closing. We should release here all our non-disposable resources.
Now comes the fun part: creating all the Direct3D/DXGI objects to get a valid backbuffer. Start by instantiating a new Direct3D11.Device and specify DriverType.Hardware in the constructor. If this fails it means that you don’t have any hardware devices capable of using DirectX so you will have to fall back to software or upgrade your GPU!
- SharpDX.Direct3D11.Device defaultDevice = new SharpDX.Direct3D11.Device(DriverType.Hardware, DeviceCreationFlags.Debug);
We have to execute a series of queries to retrieve the final object that we will need: a DXGI.Factory2 that will allow us to create a swap chain for our CoreWindow based on the settings we specify in a SwapChainDescription1 instance. Finally, we create a RenderTargetView from said swap chain and save it for future use.
- SharpDX.DXGI.Adapter dxgiAdapter = dxgiDevice2.Adapter;
- SharpDX.DXGI.Factory2 dxgiFactory2 = dxgiAdapter.GetParent<SharpDX.DXGI.Factory2>();
- // Description for our swap chain settings.
- SwapChainDescription1 description = new SwapChainDescription1()
- {
- // 0 means to use automatic buffer sizing.
- Width = 0,
- Height = 0,
- // 32 bit RGBA color.
- Format = Format.B8G8R8A8_UNorm,
- // No stereo (3D) display.
- Stereo = false,
- // No multisampling.
- SampleDescription = new SampleDescription(1, 0),
- // Use the swap chain as a render target.
- Usage = Usage.RenderTargetOutput,
- // Enable double buffering to prevent flickering.
- BufferCount = 2,
- // No scaling.
- Scaling = Scaling.None,
- // Flip between both buffers.
- SwapEffect = SwapEffect.FlipSequential,
- };
- // Generate a swap chain for our window based on the specified description.
- swapChain = dxgiFactory2.CreateSwapChainForCoreWindow(device, new ComObject(window), ref description, null);
- // Create the texture and render target that will hold our backbuffer.
- Texture2D backBufferTexture = Texture2D.FromSwapChain<Texture2D>(swapChain, 0);
- backBuffer = new RenderTargetView(device, backBufferTexture);
Let’s finish this up by creating our main loop. Since CoreWindow doesn’t do it by default, you have to create your own loop and check when to exit the application (key pressed, focus lost, etc.). So just slap a while (true) in the Run() function and exit it with a return when you want (in this tutorial we check for the Escape key being pressed with window.GetAsyncKeyState(VirtualKey.Escape) == CoreVirtualKeyStates.Down). For now, the only Direct3D operations that we will be performing is to set the backbuffer and clear it with the color red, and then presenting it:
- context.OutputMerger.SetTargets(backBuffer);
- context.ClearRenderTargetView(backBuffer, Color.Red);
- // Present the current buffer to the screen.
- swapChain.Present(1, PresentFlags.None);
That’s it. You can grab the entire source code from the GitHub repo. Stay tuned for more articles!


