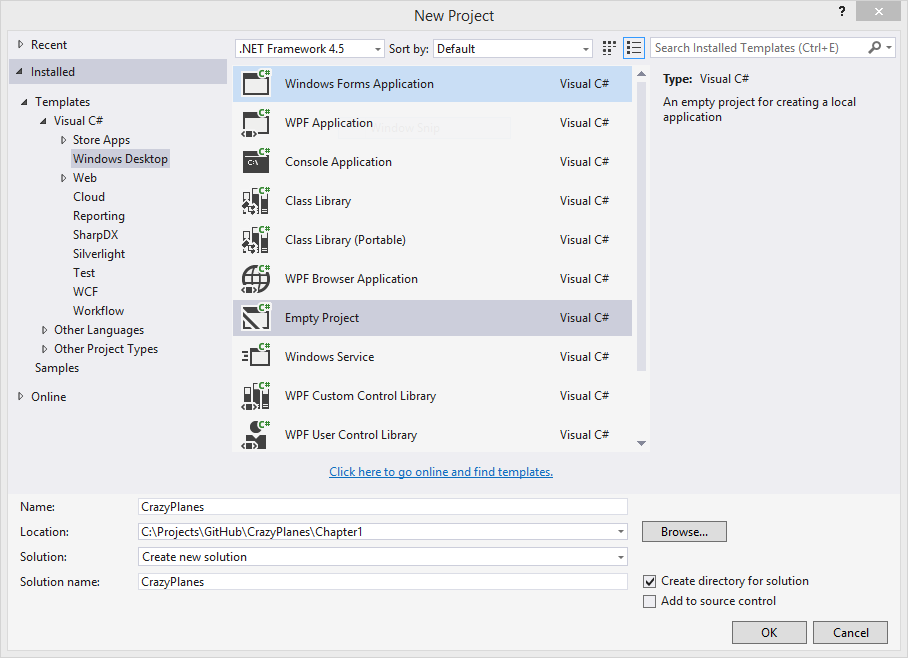
Now that we know the bare minimum on how to configure a SharpDX Toolkit project from scratch, it’s time to reveal more about what kind of game we are going to develop: a Flappy Bird clone. You can love or hate it, but you have to admit that it’s a good candidate to learn the basics of game development: 2D drawing, input, playing sounds and collision detection.
In this tutorial, we are going to focus on how to load our first texture and draw it with the SpriteBatch class. So go ahead and clone or download the source code of the previous article if you don’t have it, because we are going to extend it.
The ContentManager class
Much like XNA, SharpDX Toolkit has a ContentManager class for managing the assets (content files for textures, sounds, etc.) that a game has. It has a generic method, Load, which receives a string with the path of the asset file and returns an object of the specified type that represents the asset loaded into memory, throwing different kinds of exceptions if any error happens (asset not found, format not supported…).
The ContentManager also acts as a cache system, since it saves references to assets already loaded and returns them without having to re-read the data if they are requested. After all, if two game objects of the same type (for example, an enemy) are instantiated, they will end sharing the same texture when being drawn.
Like in XNA, the Game class already has a ContentManager property named Content, just for convenience. But one new feature is the addition of the Unload function, which allows us to unload individual asset files instead of having to dispose of all of them.
Loading a texture
It’s time to get our hands dirty with code. First, download the free Tappy Plane asset pack made by the awesome Kenney. Open the ZIP file and extract one of the PNG images of a plane of your liking.
Next, add a Content folder to the game project from the Solution Explorer window. Copy the plane texture inside it (we will be renaming it to “Plane.png”) and, in the Properties window that shows when selecting it, change its Build Action to ToolkitTexture. If this new option doesn’t show, close the solution and reopen it so the new build actions added by SharpDX Toolkit are reloaded.
Back to our Game class, we need to define a field of type Texture2D (careful! Use the one inside the SharpDX.Toolkit.Graphics namespace, and NOT the one inside SharpDX.Direct3D11) to hold the reference of our texture used for drawing. Now we can proceed to load it, but first we have to define the default directory of our existing ContentManager, so it knows where to look for assets when loading them. This can be done in the constructor, just by setting the property Content.RootDirectory.
public CrazyPlanesGame()
{
deviceManager = new GraphicsDeviceManager(this);
deviceManager.PreferredBackBufferWidth = 480;
deviceManager.PreferredBackBufferHeight = 800;
this.Content.RootDirectory = “Content”;
}
Now, our Game class has a specific function where we can put our content loading code. It’s got the descriptive name LoadContent, and you can override it and safely call any asset loading code from there since it’s executed just after the graphics device is initialized but before any actual drawing is performed. This way, any Direct3D internal objects needed for loading and sending the data to the GPU are already available.
So, let’s just call Content.Load passing the path to our plane texture relative to the Content directory. Also note that like in XNA you don’t need to specify the extension of the asset since all of them are compiled to an optimized format stored in a container file with the extension .tkb. The only downside to this approach is that you can’t have two assets with the same name (even if they have different extensions, like a PNG texture and an OBJ model) in the same directory.
protected override void LoadContent()
{
this.planeTexture = this.Content.Load<Texture2D>(“Plane”);
base.LoadContent();
}
Now you can try running your project to check that everything is fine. The Content.Load line will throw an AssetNotFoundException if it has any problems finding the asset file, and a NotSupportedException in case anything goes wrong when trying to load it.
Drawing with SpriteBatch
When drawing 2D elements to the screen we have a very helpful class that will take care of a lot of boilerplate (creating the vertex/index buffers, loading the shaders…) for us. It’s the SpriteBatch, and by instantiating a copy of it we can draw our textures to the screen just by specifying the position in pixels and the texture to draw. For future reference, the representation of a texture object (or a part of it) on screen is called a sprite, so the SpriteBatch class is named that way since it groups commands for drawing sprites into batches and then executes them for better performance.
So let’s go ahead and declare a field for holding our SpriteBatch. To initialize it we need for the graphics device to be available like when loading content, but to keep our code cleaner the Game class provides another function where we can create all our non-asset data: Initialize.
protected override void Initialize()
{
this.spriteBatch = new SpriteBatch(this.GraphicsDevice);
base.Initialize();
}
Now let’s get back to the Draw function that we added in the previous tutorial, and draw our sprite after clearing the screen. When you want to draw something with SpriteBatch, you must first call its Begin method so it enters into a valid state; after this, feel free to make any Draw or DrawString (for drawing text) calls you want. When finished, make sure you call End so the commands you entered are sent to the GPU and drawn on screen. Failing to follow this sequence will likely raise an InvalidOperationException.
We want to draw our plane perfectly centered, so we will need to access the GraphicsDevice.BackBuffer properties named Width and Height. These store the dimensions of our back buffer, in other words, the texture where everything is drawn to before the GPU presents it on screen. But since the default origin for positioning a sprite drawn with SpriteBatch is the top left corner, we have to take into account the size of the plane texture too:
Vector2 planePosition = new Vector2(
(this.GraphicsDevice.BackBuffer.Width / 2.0f) – (this.planeTexture.Width / 2.0f),
(this.GraphicsDevice.BackBuffer.Height / 2.0f) – (this.planeTexture.Height / 2.0f));
Having everything we need, let’s draw our sprite. The third parameter for SpriteBatch.Draw is a SharpDX.Color that will be applied as a tint to the sprite; in our case we want to see the texture as is, so we specify it to be white.
this.spriteBatch.Begin();
this.spriteBatch.Draw(this.planeTexture, planePosition, Color.White);
this.spriteBatch.End();
Now you can run the project and see that the plane sprite finally shows! However, there are weird pixels around its borders. This is due to SharpDX Toolkit using premultiplied alpha blending (transparency), much like XNA did, but the sprite doesn’t! Thankfully this can be easily changed by modifying the call to SpriteBatch.Begin and changing its BlendState parameter:
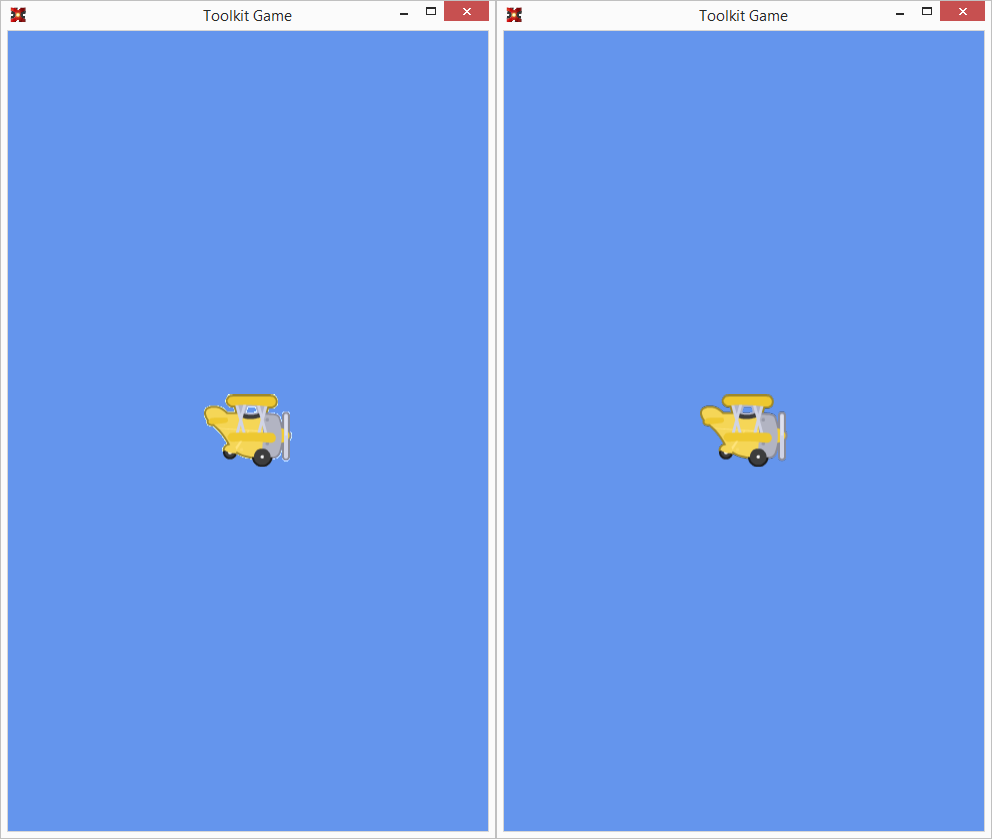
Now the sprite displays adequately! And with this ends this tutorial. Feel free to fiddle with the source code and try loading more textures, playing with the different overloads of the SpriteBatch.Draw function or even making the plane move in preparation for the next one.
Source code
You can find the source code for this tutorial and the following ones in this GitHub repository, inside the Chapter2 folder.