Adding tiled backgrounds to UWP apps with Win2D

One of the many features that Silverlight never got from WPF was the ability to tile or repeat the image used on an ImageBrush. However, it had some workarounds like applying a custom pixel shader to get the same result – but, since the Silverlight version used on Windows Phone was even more limited, there hasn’t been a proper replacement (other than hacks based on displaying multiple images on a custom Panel control) in either Silverlight for Windows Phone, Windows Runtime or the new UWP platform.

Thankfully, now we have Win2D which combines the powerful graphical capabilities of Direct2D with the easiness of use of the XAML stack – and in this tutorial we are going to learn how to add a tiled background to our UWP app with very little code.

Approach

The premise is very simple – we will put an instance of Win2D’s CanvasControl in the root container of the page so it draws behind everything else, set both of its alignments to Stretch and fill it entirely using a CanvasImageBrush. Also, in the demo project, we will add some UI controls to tweak the scaling and opacity values to better showcase the flexibility of image brushes.

So, let’s get started!

Implementation

Start by adding the Win2D library from NuGet on your project, and as stated before, adding a CanvasControl element to the XAML page you want to. Hook up its CreateResources and Draw events and let’s jump to the code behind.

Declare two fields of type CanvasBitmap and CanvasImageBrush, as we will need them to hold the references to the background image and the brush that will be used for drawing, respectively. Then we can proceed to initialize them in the event handler for CreateResources that we added previosly – but wait, there’s a catch!

Win2D’s CanvasControl is nice enough to start drawing only when all resources have been loaded. But we have a problem: our event handler is of type void and we will need to do some asynchronous calls inside it; adding the async modifier to it won’t solve anything since async void methods are fire-and-forget. The answer is to use CanvasCreateResourcesEventArgs.TrackAsyncAction.

By wrapping all our async calls inside a Task and casting it to an IAsyncAction by calling AsAsyncAction, we can pass all our resource loading operation to the CanvasControl so it can track when they have completed, and start issuing draw events. Sounds a bit confusing? It can be at first, so check the following code snippet:

[code lang=”csharp”]
private void BackgroundCanvas_CreateResources(CanvasControl sender, CanvasCreateResourcesEventArgs args)
{
args.TrackAsyncAction(Task.Run(async () =>
{
// Load the background image and create an image brush from it
this.backgroundImage = await CanvasBitmap.LoadAsync(sender, new Uri("ms-appx:///Background.jpg"));
this.backgroundBrush = new CanvasImageBrush(sender, this.backgroundImage);

// Set the brush’s edge behaviour to wrap, so the image repeats if the drawn region is too big
this.backgroundBrush.ExtendX = this.backgroundBrush.ExtendY = CanvasEdgeBehavior.Wrap;

this.resourcesLoaded = true;
}).AsAsyncAction());

}
[/code]

As you can see, we just load our background image from disk and create the CanvasImageBrush with it. And to make it tile properly, we change both ExtendX and ExtendY to CanvasEdgeBehavior.Wrap – the default value is CanvasEdgeBehavior.Clamp which just extends indefinitely the last row or column of pixels.

That’s it for the initialization. Now let’s proceed with the drawing function, which is even easier, since we just fill a rectangle with the same size as the bound’s controls using the brush we have just created:

[code lang=”csharp”]
private void BackgroundCanvas_Draw(CanvasControl sender, CanvasDrawEventArgs args)
{
// Just fill a rectangle with our tiling image brush, covering the entire bounds of the canvas control
var session = args.DrawingSession;
session.FillRectangle(new Rect(new Point(), sender.RenderSize), this.backgroundBrush);
}
[/code]

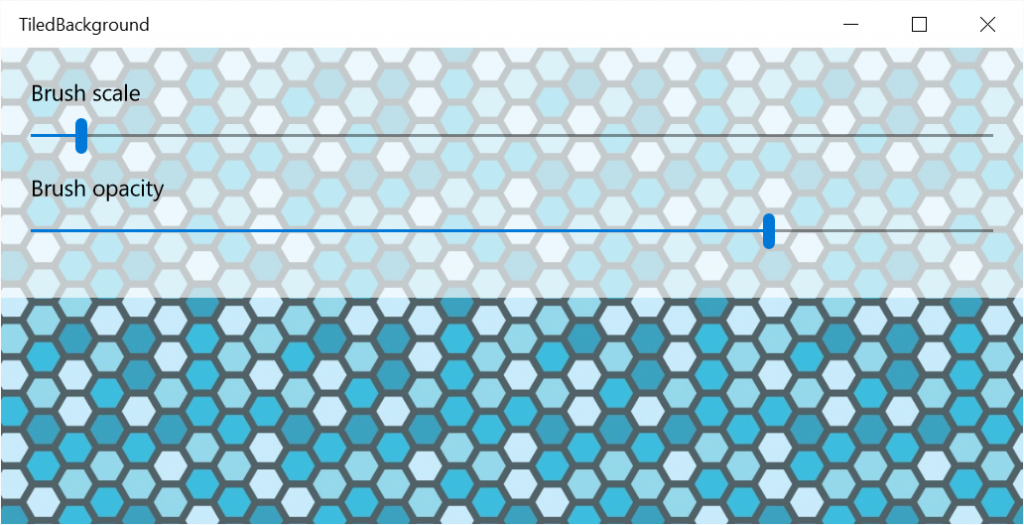
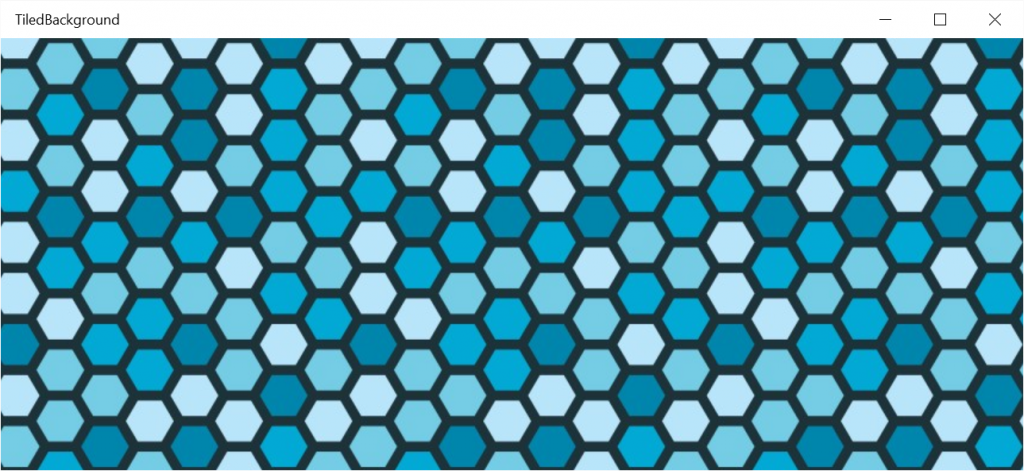
Tiled background using Win2D

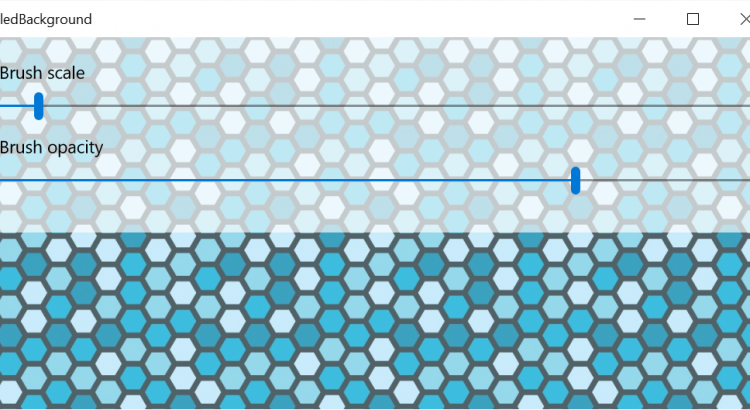
And that’s it! We now have a nicely tiling background. And to add a bit more of flexibility, we are going to explore the possibility of changing the size of the tiled image (by default it draws it with the same physical size as the source image) and its opacity. Add two Slider controls and hook their ValueChanged events – one for the scale, another for the opacity.

Let’s start with the opacity one. We will just divide its value by 100 (since Slider controls only support integer values, and the opacity range goes from 0.0 to 1.0) and assign it to the Opacity value of our ImageBrush. The call to CanvasControl.Invalidate will force a redraw of the background canvas so it updates accordingly:

[code lang=”csharp”]
private void OpacitySlider_ValueChanged(object sender, RangeBaseValueChangedEventArgs e)
{
// Don’t modify the brush properties if it hasn’t been initialized yet
if (!this.resourcesLoaded)
{
return;
}

// Change the opacity of the brush
this.backgroundBrush.Opacity = (float)(e.NewValue / 100.0);
this.BackgroundCanvas.Invalidate();
}
[/code]

Wait a minute – notice the resourcesLoaded flag? We added it so we don’t change any brush properties before it has been created. Just create it as a boolean field and set it to true at the end of the Task that creates your graphics resources.

And finally, let’s tackle the image scaling. This will be as easy as creating a Matrix3x2 that holds a transform (in our case, one that only has scaling) and assigning it to the brush’s Transform property. We can do lots of thing with this – rotate the brush image, skew it… your imagination is the limit!

[code lang=”csharp”]
private void ScaleSlider_ValueChanged(object sender, RangeBaseValueChangedEventArgs e)
{
// Don’t modify the brush properties if it hasn’t been initialized yet
if (!this.resourcesLoaded)
{
return;
}

// Apply a scale matrix transform to the brush; this way we can control how big the image will be drawn
this.backgroundBrush.Transform = System.Numerics.Matrix3x2.CreateScale((float)(e.NewValue / 100.0));
this.BackgroundCanvas.Invalidate();
}[/code]

Tiled background with opacity and scale selection controls

Source code

Get the full source code for this tutorial’s project on the Win2D-Samples GitHub repository – it’s sitting on the TiledBackground folder.
Applying Direct2D built-in effects to bitmaps with SharpDX

One of the top features that makes Direct2D a prime candidate for developing image editing software is the inclusion of effects. These are much like the image filters that applications like Photoshop or paint.net ship with, and are fully hardware accelerated since their underlying implementation is shader-based so they execute in the GPU. An effect can have multiple input images and multiple input parameters but only one output image, which is the result of all the operations that it performs applied sequentially. Internally, an effect has a graph of atomic operations, which can have multiple steps. For example, a Gaussian blur could be implemented like this:

  • One input image.
  • One input variable (blur radius).
  • Two steps:
    • Apply horizontal blur to input image.
    • Apply vertical blur to output of first step.

However, built-in effects are totally transparent to the final user so we can know what they do but not how they do it. We will explore how custom effects work in future examples. In this tutorial we are going to learn how to use some of the built-in effects that Direct2D already implements. These are some of the most commonly used image filtering techniques (like color adjustment and blurring), and are part of the native library. We are going to modify the previous tutorial to perform a hue rotation operation in the player’s bitmap and a shadow effect in the terrain’s one.

Rendering a brush to an offscreen bitmap

First of all, since effects must be applied to bitmaps and we are drawing our terrain portion with a brush, we need to render it to an off-screen bitmap so we can postprocess it. Start by declaring a new SharpDX.Direct2D1.Bitmap1 variable and proceed to initialize it via its constructor. The size would be the total size of the rectangle we were drawing with the brush (in this case, ten times the bitmap’s width and one time the height). Inside the SharpDX.Direct2D1.BitmapProperties1 make sure you:

  • Declare the same pixel format as the backbuffer is using (Format.B8G8R8A8_UNorm and AlphaMode.Premultiplied),
  • Specify the BitmapOptions.Target options so it can be used as a target for drawing.

Now we can modify the drawing code we were using so we set this bitmap as the Direct2D context target, clear it to a transparent background color, reset the drawing transform to Matrix3x2.Identity and draw the rectangle:

  1. // Set the render target for drawing the brush
  2. d2dContext.Target = brushTarget;
  3. // Clear the rendertarget and draw the brush tiling 10 times
  4. d2dContext.BeginDraw();
  5. d2dContext.Clear(Color.Transparent);
  6. d2dContext.Transform = Matrix3x2.Identity;
  7. d2dContext.FillRectangle(newRectangleF(0, 0, terrainBitmap.Size.Width * 10, terrainBitmap.Size.Height), terrainBrush);
  8. d2dContext.EndDraw();

And here is the bitmap as it is rendered offscreen: Image as it is drawn offscreen

Initializing effect instances

Next, we are going to initialize the effect instances. For the hue rotation we only need a SharpDX.Direct2D1.Effects.HueRotation instance, but for the shadow effect we are going to follow this approach:

  • Create a SharpDX.Direct2D1.Effects.Shadow effect and set the offscreen bitmap as its input.
  • Create a SharpDX.Direct2D1.Effects.AffineTransform2D, set the shadow effect instance as its input and set the TransformMatrix to a translation matrix that will add a small offset to the shadow.
  • Blend the original image and the resulting shadow trough a SharpDX.Direct2D1.Effects.Composite effect. We need to set its InputCount to two, the affine transform effect as the first input and the offscreen bitmap as the second (since blending is done back to front).
  1. // Create hue rotation effect
  2. hueRotationEffect = new SharpDX.Direct2D1.Effects.HueRotation(d2dContext);
  3. // Create image shadow effect
  4. shadowEffect = new SharpDX.Direct2D1.Effects.Shadow(d2dContext);
  5. // Create image transform effect
  6. affineTransformEffect = new SharpDX.Direct2D1.Effects.AffineTransform2D(d2dContext);
  7. affineTransformEffect.SetInputEffect(0, shadowEffect);
  8. affineTransformEffect.TransformMatrix = Matrix3x2.Translation(terrainBitmap.PixelSize.Width * 0.25f, terrainBitmap.PixelSize.Height * 0.25f);
  9. // Create composite effect
  10. compositeEffect = new SharpDX.Direct2D1.Effects.Composite(d2dContext);
  11. compositeEffect.InputCount = 2;
  12. compositeEffect.SetInputEffect(0, affineTransformEffect);

Drawing the effects output

At last, we go back to the render block and modify how the bitmaps are drawn. First we update the effects with their updated inputs/values, and then we use DrawImage instead of DrawBitmap to draw the output of an effect:

  1. // Update input images for shadow and composite effects, and draw the resulting image.
  2. shadowEffect.SetInput(0, brushTarget, true);
  3. compositeEffect.SetInput(1, brushTarget, true);
  4. d2dContext.DrawImage(compositeEffect);
  5. // Translate again for drawing the player bitmap.
  6. d2dContext.Transform = Matrix3x2.Translation(halfWidth, halfHeight – playerBitmap.Size.Height);
  7. // Update input image and value for hue rotation effect and draw it.
  8. hueRotationEffect.SetInput(0, playerBitmap, true);
  9. hueRotationEffect.Angle = System.DateTime.Now.Millisecond % 360;
  10. d2dContext.DrawImage(hueRotationEffect);

Here you can see a screen capture of how the scene would look like: Final drawing result

Source code

As always, you can download the source code (C#/VS 2013, SharpDX 2.6.2) for this sample from its GitHub repository.

Loading and drawing bitmaps with Direct2D using SharpDX

Continuing from the tutorial where we learned how to initialize a Direct2D context and perform basic drawing, in this new sample we are going to learn how to load bitmap images and draw them directly or via brushes. So go ahead and read it if you haven’t and clone the source code as we are going to use it as a starting point. We will be needing some images to load and draw, too, so use the ones you have at hand. We will be using the free Platformer Tiles from Kenney.nl. Select two images you like, add them to the project and set their Build Action to Content. Now, in the MyViewProvider class, define two member variables of type SharpDX.Direct2D1.Bitmap1 and one of type SharpDX.Direct2D1.BitmapBrush1. We will use them to store the image data and the brush object properties respectively.

Image loading with WIC

For loading the images, we will be using the Windows Imaging Component API under the SharpDX.WIC namespace, which is implemented in the SharpDX.Direct2D1.dll assembly. This is a native and extensible Windows API that consists of a set of low-level codecs for encoding and decoding commonly used image file formats such as JPG and PNG. Relying on it we will skip the tedious job of implementing our own file format parsers. To manipulate WIC objects, first we need to instantiate an ImagingFactory object, which doesn’t need any constructor parameters. Then, we need to open the file that holds the bitmap data. For this, we can use SharpDX’s NativeFileStream, a very useful class that is similar to the old .NET’s FileStream and is more straightforward than WinRT’s StorageFile. And don’t forget to prepend Package.Current.InstalledLocation.Path to the file’s path because using a relative path won’t work.

  1. ImagingFactory imagingFactory = newImagingFactory();
  2. NativeFileStream fileStream = newNativeFileStream(Package.Current.InstalledLocation.Path + filePath,
  3.     NativeFileMode.Open, NativeFileAccess.Read);

Now we can create a BitmapDecoder instance, passing both the factory and the file stream. A third parameter is needed, we can set it to DecodeOptions.CacheOnDemand for the time being as we won’t be needing to take advantage of special cache handling. With this, now we can call GetFrame on the newly create instance to retrieve the frame index 0 (since a static image will only have one frame, while other filetypes like GIF can have more than one).

  1. BitmapDecoder bitmapDecoder = newBitmapDecoder(imagingFactory, fileStream, DecodeOptions.CacheOnDemand);
  2. BitmapFrameDecode frame = bitmapDecoder.GetFrame(0);

Having obtained the frame, now we can create a SharpDX.Direct2D1.Bitmap1 with it, can’t we? Not so fast. The pixel data is still encoded in the image’s original colour format, and we should be converting all our bitmaps to the same pixel format for the sake of normalization; for this, we can use SharpDX.WIC.FormatConverter. Start by instantiating a copy, passing the imaging factory as the only constructor parameter, and call its Initialize method specifying the bitmap frame we previously extracted and the desired target pixel format. The catch is that default pixel formats are stored as the unique identifier associated to the format encoder/decoder (a unique System.Guid), and the available ones are declared inside SharpDX.WIC.PixelFormat. We will be using RGBA, 32 bits per pixel with premultiplied alpha (PixelFormat.Format32bppPRGBA), but BGRA can be used too (and must be used if working with a software device since it’s the only one supported).

  1. FormatConverter converter = newFormatConverter(imagingFactory);
  2. converter.Initialize(frame, SharpDX.WIC.PixelFormat.Format32bppPRGBA);

Having the correct pixel format, we can finally create the desired SharpDX.Direct2D1.Bitmap1 through the SharpDX.Direct2D1.Bitmap1.FromWicBitmap function. It receives a Direct2D context and a SharpDX.Direct2D1.BitmapSource. And guess who inherits from that class? That’s it, the format converter we previously created.

  1. newBitmap = SharpDX.Direct2D1.Bitmap1.FromWicBitmap(d2dContext, converter);

Creating a bitmap brush

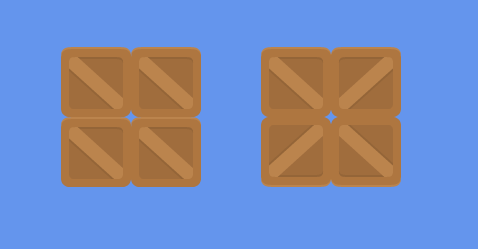
Now we can proceed to create the SharpDX.Direct2D1.BitmapBrush1 brush used for filling geometric shapes. It’s as simple as instantiating it, passing as parameters the Direct2D context, the desired bitmap and a SharpDX.Direct2D1.BitmapBrushProperties1 where we can define the ExtendModeX and ExtendModeY to specify how the brush behaves when drawing regions bigger than the bitmap’s size. You can choose between Clamp, Wrap and Mirror for repeating the last column/row of pixels, repeating the entire image or mirroring it, respectively. The following image shows the Wrap and Mirror modes applied to both axes: Image wrapping (left) and mirroring (right)

  1. terrainBrush = newBitmapBrush1(d2dContext, terrainBitmap, newBitmapBrushProperties1()
  2. {
  3.     ExtendModeX = ExtendMode.Wrap,
  4.     ExtendModeY = ExtendMode.Wrap,
  5. });

Drawing bitmaps and brushes

Finally we can proceed to draw bitmaps to the screen. As before, this must be done between a BeginDraw/EndDraw block. Let’s start by filling a rectangle with the bitmap brush, centered on the screen, and with a width greater than the bitmap’s size to see the wrapping in action.

  1. int halfWidth = this.swapChain.Description.ModeDescription.Width / 2;
  2. int halfHeight = this.swapChain.Description.ModeDescription.Height / 2;
  3. d2dContext.FillRectangle(newRectangleF(halfWidth – 350, halfHeight, 700, 70), terrainBrush);

But wait, something’s not right, is it? Wrong brush tiling This happens because while we are specifying a region to be filled in coordinates relative to the upper left corner of the screen, the brush uses the origin of coordinates as its point of alignment. We can fix this by specifying a translation SharpDX.Matrix3x2 to offset it and changing the rectangle’s X and Y coordinates to (0, 0).

  1. d2dContext.Transform = Matrix3x2.Translation(halfWidth – 350, halfHeight);
  2. d2dContext.FillRectangle(newRectangleF(0, 0, 700, 70), terrainBrush);

Finally, let’s specify another transform matrix and draw a single bitmap. This is achieved via the DrawBitmap function, which receives the bitmap to be drawn, a float value specifying the opacity (alpha value) to be used and an interpolation mode to apply in case the drawing size is smaller or larger than the bitmap’s size.

  1. d2dContext.Transform = Matrix3x2.Translation(halfWidth, halfHeight – playerBitmap.Size.Height);
  2. d2dContext.DrawBitmap(playerBitmap, 1.0f, SharpDX.Direct2D1.BitmapInterpolationMode.Linear);

Say hello to the little alien astronaut!

Source code

As always, the source code can be downloaded from GitHub. This time the SharpDX libraries are referenced from NuGet and the project is a Windows 8.1 application, making it editable only from Visual Studio 2013.