Back when Windows 7 was launched, DirectX 11 introduced a new API for text rendering called DirectWrite. It was intended as a fresh start from the old GDI implementation, featuring full unicode support, ClearType text rendering, OpenType typographic features and much more. One of the advantages of DirectWrite is that although it is a DirectX API, it has been architectured as a standalone component with no dependency on any of the existing rendering ones, meaning that you can use it from Direct3D, Direct2D or even your own custom renderer. As an example of its independence, since version 4 the web browser Mozilla Firefox uses DirectWrite on supported platforms for text rendering.
This tutorial is based on the previous one about basic Direct2D initialization and drawing so go ahead and clone the source code from GitHub if you haven’t done it already.
Initialization
This is very simple. We just instantiate a new SharpDX.DirectWrite.Factory object, which doesn’t need any parameters unless you want to specify if it will be a shared factory to be used across different threads.
DirectWrite factory initialization
- // Create the DirectWrite factory object.
- SharpDX.DirectWrite.Factory fontFactory = new SharpDX.DirectWrite.Factory();
Now it’s time to create the objects that will contain the neccessary information for drawing text.
- A TextFormat is an object that will hold a font’s family, size and other properties like style and weight. We will be using Segoe UI with a size of 24 DIPs and normal weight and style. Note that the font is specified by its family name; in case it isn’t found no errors will be thrown, instead falling back to a default one.
- A TextLayout is a way of arranging a specified string of text inside a rectangle for further drawing. We will be creating two of them for demonstrating the different methods of rendering moving text.
TextFormat and TextLayout creation
- // Create a TextFormat object that will use the Segoe UI font with a size of 24 DIPs.
- textFormat = new TextFormat(fontFactory, “Segoe UI”, 24.0f);
- // Create two TextLayout objects for rendering the moving text.
- textLayout1 = new TextLayout(fontFactory, “This is an example of a moving TextLayout object with snapped pixel boundaries.”, textFormat, 400.0f, 200.0f);
- textLayout2 = new TextLayout(fontFactory, “This is an example of a moving TextLayout object with no snapped pixel boundaries.”, textFormat, 400.0f, 200.0f);
Drawing
Drawing text is quite straightforward. Since the Direct2D DeviceContext object already has functions to render text using DirectWrite objects, we won’t need to roll out our own glyph rasterizer. Just a one line call to SharpDX.Direct2D1.DeviceContext.DrawText inside a BeginDraw/EndDraw block will output our text on screen.
Here we are going to draw two lines of text with a predefined layout region. The difference is that the first one will be clipped to that region (DrawTextOptions.Clip) while the second one won’t (DrawTextOptions.None).
Drawing normal and clipped text
- // Draw a block of text that will be clipped against the specified layout rectangle.
- d2dContext.FillRectangle(new RectangleF(50, 50, 200, 200), backgroundBrush);
- d2dContext.DrawText(“This text is long enough to overflow the designed region but will be clipped to the containing rectangle. Lorem ipsum dolor sit amet, consectetur adipiscing elit. “, textFormat, newRectangleF(50, 50, 200, 200), textBrush, DrawTextOptions.Clip);
- // Draw a block of text that will overflow the specified layout rectangle.
- d2dContext.FillRectangle(new RectangleF(50, 300, 200, 200), backgroundBrush);
- d2dContext.DrawText(“However, this other text isn’t going to be clipped: Lorem ipsum dolor sit amet, consectetur adipiscing elit. Aenean gravida dui id accumsan dictum.”, textFormat, new RectangleF(50, 300, 200, 200), textBrush, DrawTextOptions.None);
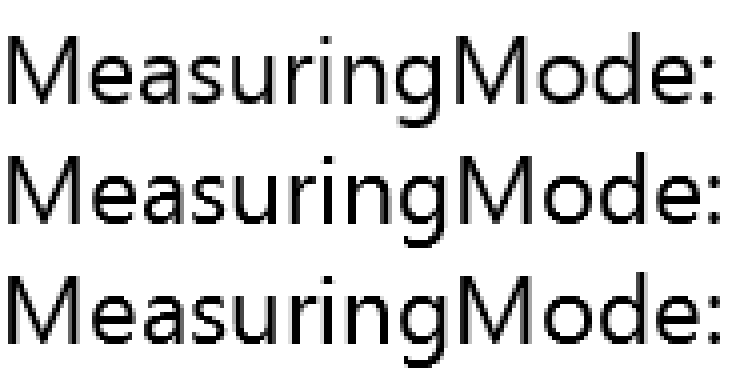
In case you want the text to appear crisper or more blurred, you can specify different measuring modes when calling DrawText:
- Natural: Measures the text using the ideal glyph metrics, without taking into account the current screen resolution. This is the default value in case it’s not specified.
- GdiClassic: Adjusts the glyph’s metrics based on the current display resolution.
- GdiNatural: Again takes into account the display resolution but treats the font as if it was used for ClearType rendering.
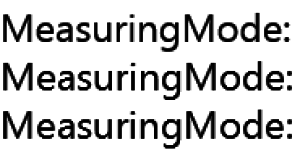
The following image is a capture of the sample with a 400x zoom. Each line is drawn using Natural, GdiClassic and GdiNatural. Note that Natural measuring mode leaves less gap between each glyph. Click the image to view at full size.
Now, let’s see how we can draw TextLayout objects. We just have to call SharpDX.Direct2D1.DeviceContext.DrawTextLayout, and since the font and string information are already stored in the TextLayout, we only need to specify the position, parameter and text brush. Using DrawTextLayout instead of DrawText is recommended since DrawText always creates a new TextLayout object internally, thus generating extra garbage.
In the following code, we are drawing two similar TextLayout blocks that move vertically. The difference is that the second one uses DrawTextOptions.NoSnap so the glyphs aren’t snapped to an integer position, allowing for subpixel movement and giving an smoother effect.
Drawing moving TextLayout
- // Draw moving text.
- d2dContext.FillRectangle(new RectangleF(300, 300, 400, 200), backgroundBrush);
- d2dContext.DrawTextLayout(new Vector2(300, 350 + layoutYOffset), textLayout1, textBrush);
- // Draw moving text without pixel snapping, thus giving a smoother movement.
- d2dContext.FillRectangle(new RectangleF(750, 300, 400, 200), backgroundBrush);
- d2dContext.DrawTextLayout(new Vector2(750, 350 + layoutYOffset), textLayout2, textBrush, DrawTextOptions.NoSnap);
Note that in the following animated image, the left text’s movement (disregarding minor encoding errors) is more jerky.
That’s it, we have learned how to do basic text drawing with SharpDX. You can get the finished source code from the corresponding GitHub repository.